Are you looking for an honest AidWP review of the plugin? Or wondering if it’s the best Stripe donation plugin for your WordPress site? If so, then here we go.
It certainly goes without saying that you should portray your fundraising efforts as tastefully and skillfully as you can. And the first step in that process is to display elegant payment forms. Along with that, you also need to connect with a viable payment gateway so as to receive donations and payments.
Seems like a lot of work, right? Yet, don’t be overpowered! With the right plugin or tool, this task is much easier to do. And much to your delight, it’s the AidWP plugin that you’re looking for! This plugin helps you collect donations or receive payments via Stripe in no time.
So, in this AidWP review article, we’ll explore the AidWP plugin from every possible angle to determine whether it’s the best Stripe donation plugin available.
Let’s get started!
Table of Contents
A. Overview of AidWP Plugin
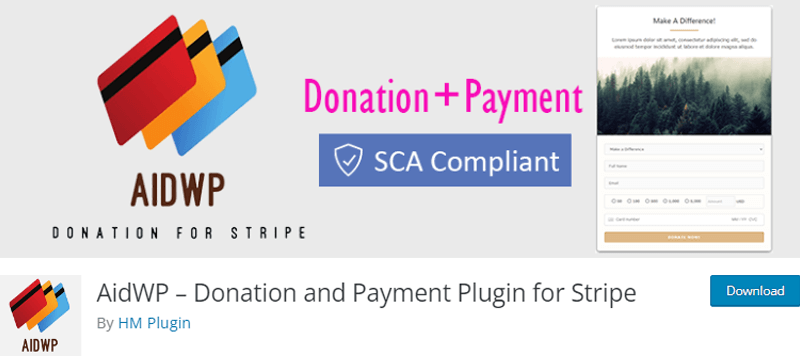
Crafted by HM Plugins, AidWP is one of the growing WordPress donation plugins out there in the market. Precisely, this plugin helps you collect payments or receive donations via the Stripe payment gateway on your WordPress website.
In fact, this plugin’s simplicity and usefulness are what give it power. It has a fairly straightforward user interface and it’s quite easy to use. Consequently, anyone, including non-techies can quickly create donation or payment forms. And further, place it at the designated location on your website.
Even more, after installation and a few simple configurations, you can effortlessly accept donations from people all around the world. They can also donate money using their credit card. And the same thing applies to the buyers too. Meaning, you can accept payments via credit cards.
Furthermore, AidWP’s potential goes beyond just receiving money or donations from your WordPress website. As it offers features like fully configurable forms, support for 150+ currencies, no extra charge for transactions, minimal settings, and so much more.
With that being said, let’s dig into the next section of this AidWP review to explore more about the AidWP plugin.
B. Key Features of the AidWP Plugin
The developing team of AidWP has thoughtfully prioritized the features and capabilities. We’re not just saying it, though! The wide feature set of the plugin speaks for itself. So, let’s check them more closely now in this section of AidWP review.
1. Accept Donations & Receive Payments
As mentioned earlier, one of the significant highlights of the AidWP plugin is it allows you to accept donations effortlessly via a donation form. Along with that, if you’re selling any kind of products or services, then you can easily collect payments too via a payment form.
So, all you have to do is create and place your donation or payment form in a few simple and easy steps. And further, place it on any page you want on your website. Not to add, donors and buyers can even use their credit cards to donate money or make payments.
2. Stripe as Payment Gateway
Another key feature of the AidWP plugin is that it uses Stripe as its payment gateway. That’s to say, you can easily receive funds and payments to your account via the medium of Stripe. All you have to do is connect your Stripe API keys to the key settings of this plugin. And, you’re all set.
Not to mention, Stripe’s software and APIs are used by millions of businesses of all sizes to accept payments. As a result, we can describe it as a comprehensive integrated suite of payment products.
3. Customizable Donation Forms
It definitely takes a lot of work to create a donation form from the ground up. Even more, it’s way too time and effort-consuming, particularly when you’re not into techy stuff. Nevertheless, you don’t have to worry anymore! The AidWP plugin team is well aware of this concern.
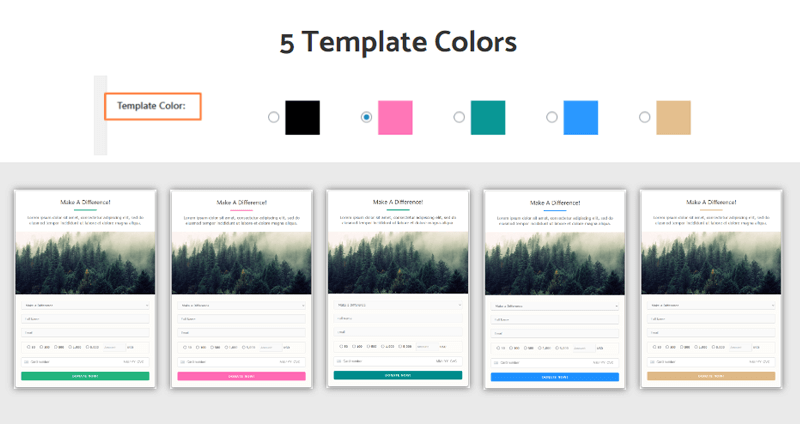
Thereby, it presents you with full-featured donation templates that are simple to utilize. Furthermore, you can tailor the donation form as you like to suit your preferences. Precisely, you get to pick from 5 different template colors, set the donation amount parameters, and do so much more.
4. Advanced Donor List Panel
Once you initiate your fundraising campaign, then it’s very obvious that you’d definitely like to watch out for your donors. Or say, if you’re selling something, then you’d like to see who made the payment and how much. These insights are quite crucial to properly knowing the payment and donation details.
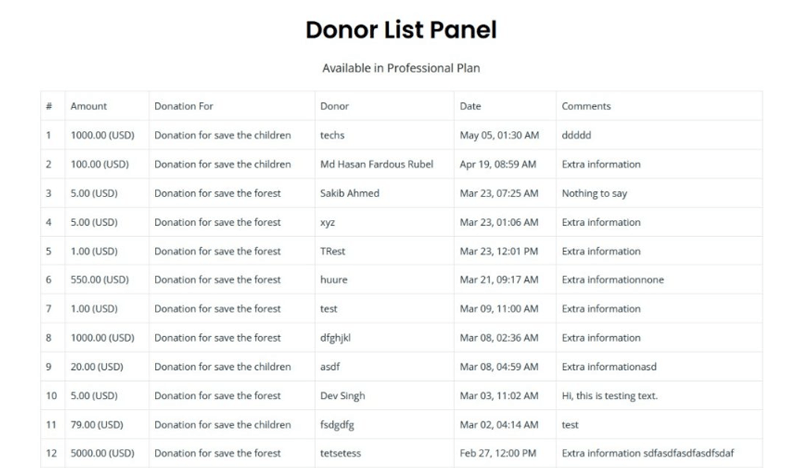
Delightfully, the AidWP plugin provides an advanced donor list panel in its premium version. With that, you get to see the amount donated, donation for, donor name, date of donation made, and so on. All these details help you make more fundraising campaigns in the future.
5. Supports 150+ Currency
Next, a subtle yet crucial feature of the AidWP plugin is that it supports multiple currencies. To be precise in number, it’s more than 150. Sounds amazing, right?
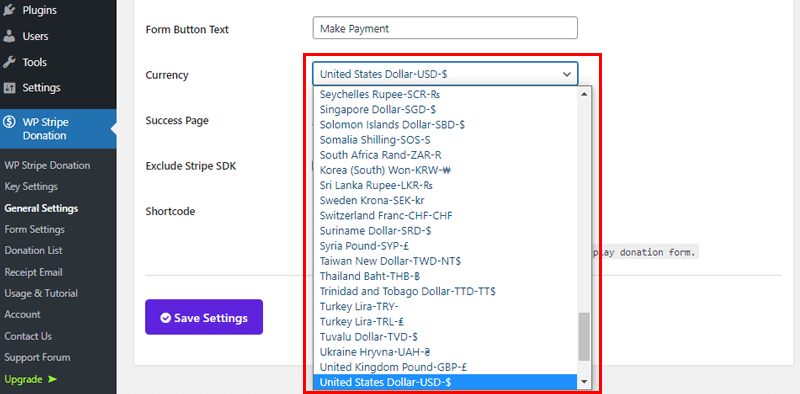
From the General Settings of the admin panel, you can quickly set your currency from a wide range of currency lists. Consequently, you can collect donations from the global audience. And in case, if you’re selling your goods and services, then you can expand your business to the global level.
6. Tailored Email Receipt
Similarly, another significant highlight of this plugin is that it provides you with tailored email receipt settings. Using this capability, you don’t have to personally or say individually send the receipt emails to your donors. All you have to do is tweak a few settings in the pre-tailored email receipt.
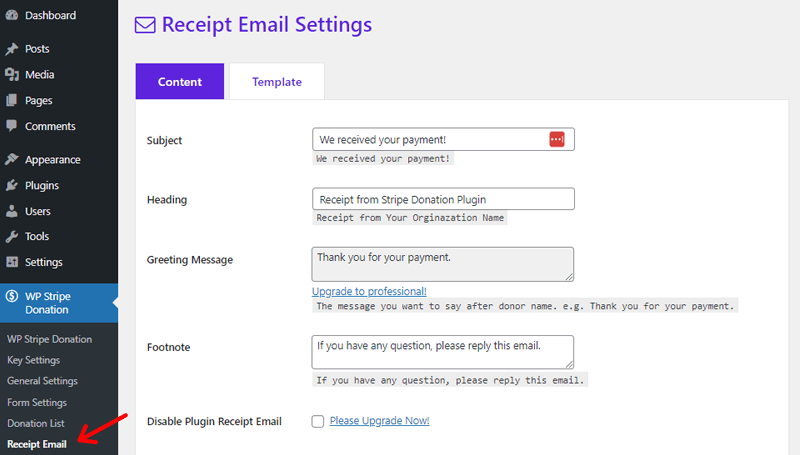
Whereby, you can easily personalize the subject, heading, greeting message, footnote, and so much more. So, when a donation is made successfully, the donor receives an email notification right away. Ultimately, this makes the campaigning process way too easy and quick.
7. Other Features
Besides the aforementioned features, there are various extra features that the AidWP plugin offers to you. Such as:
- Zero Additional Fees for Transaction.
- Prevents Bot Attacks With Number Matching Captcha.
- Built-in “Thank You” page that is editable with Elementor.
- SCA, or Strong Customer Authentication, for European customers.
- Effortlessly save the exported Donor List CSV file in a safe location.
- Choose from a variety of predefined donation amounts that will appear on the donation form.
- It’s 100% responsive, which means it works on desktops, tablets, and mobile devices.
So, these are just some of the main capabilities that the AidWP plugin offers. Now, let’s proceed to the next area of this AidWP review, which is about how to install the AidWP plugin.
C. Getting Started with AidWP Plugin
In this AidWP review portion, we’ll cover the installation and setup procedures for the AidWP plugin. Not to mention, you can use any of the appropriate themes to kickstart your fundraising campaign.
So, stick with us as we lead you through the following steps in this section of the AidWP review.
Step 1: Install the Plugin
You can quickly get the free version of the AidWP plugin to use on your site. The installation and activation process for the AidWP plugin is the same as doing so with any other WordPress plugin.
First thing first, log in to your WordPress dashboard. Following that, go to the ‘Plugins’ section. Then, click on the ‘Add New’ option there.
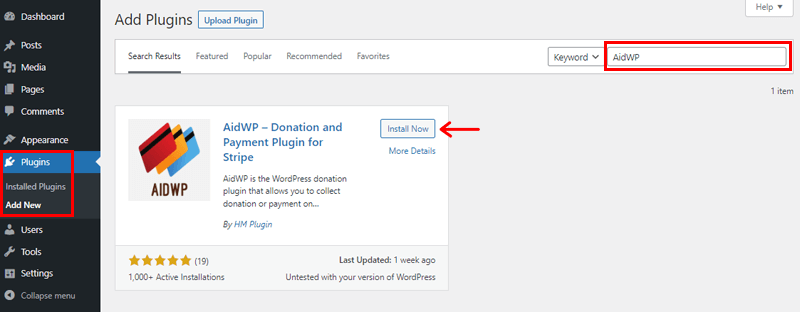
With that, you’ll see a search box on the top right side. There, type the keyword ‘AidWP’ and click enter to search for this plugin.
Shortly, after that, you can see the search results. Once you found the ‘AidWP’ plugin, simply click on the ‘Install Now’ button for installing it on your dashboard.
Step 2: Activate the Plugin
Once the installation is finished, the Activate button takes the place of the Install Now button. Accordingly, click on the ‘Activate’ button.
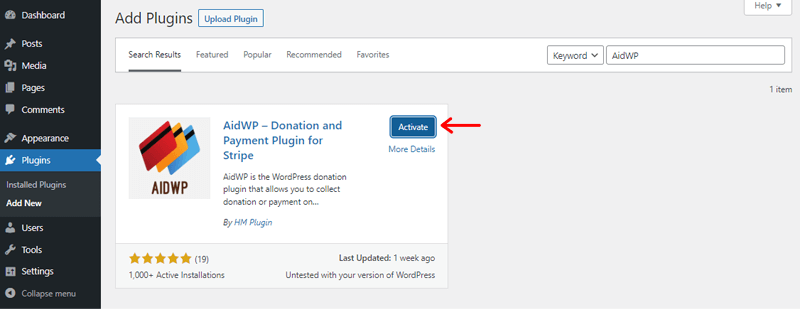
This activates the AidWP plugin on your WordPress website. Meanwhile, you can also find out that a new navigation menu called “WP Stripe Donation” is added to your dashboard.
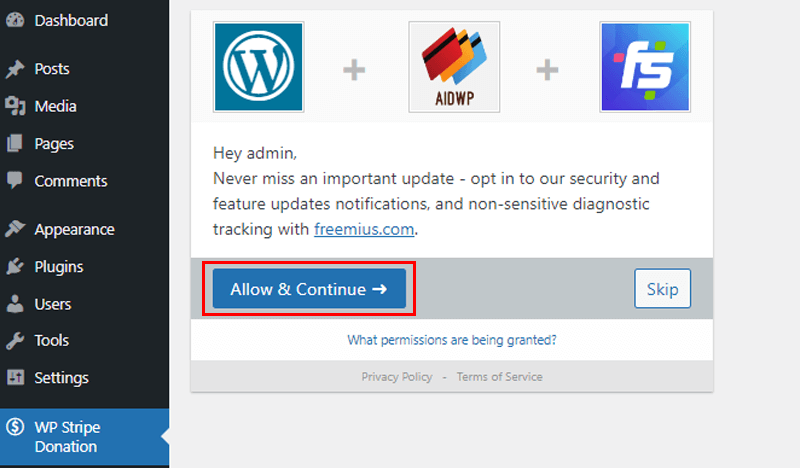
Also, you can find an option to enable the Freemius service here while using the AidWP plugin. Simply click on the ‘Allow & Continue’ button.
For more, refer to our comprehensive guide on installing a WordPress plugin if you need assistance with the plugin installation.
D. How to Setup a Donation Form using AidWP Plugin?
All right then, we’ve reached one of the most important portions of this review. Now it’s time to explore how you can set up a donation form using the AidWP donation plugin.
Just follow along with us as we walk you through the process step by step in this section of the AidWP review.
Step 1. Setup Your Donation Form
Before anything else, firstly, you need to set up your donation form. And as mentioned earlier, the AidWP plugin offers you simple configuration options and templates for your donation form.
Majorly, you get 2 major settings options to set up your donation form. They are General Settings and Form Settings. So, let’s configure them one by one.
Configuring General Settings
To do so, from the left navigation of your dashboard go to ‘WP Stripe Donation’ and further click on the ‘General Settings’ option.
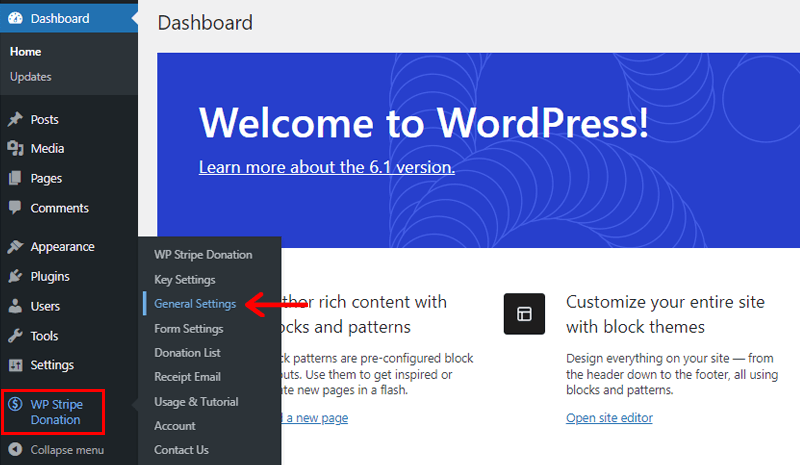
Following that, you’ll see the page as shown below. Here, you can find various important settings. Such as:
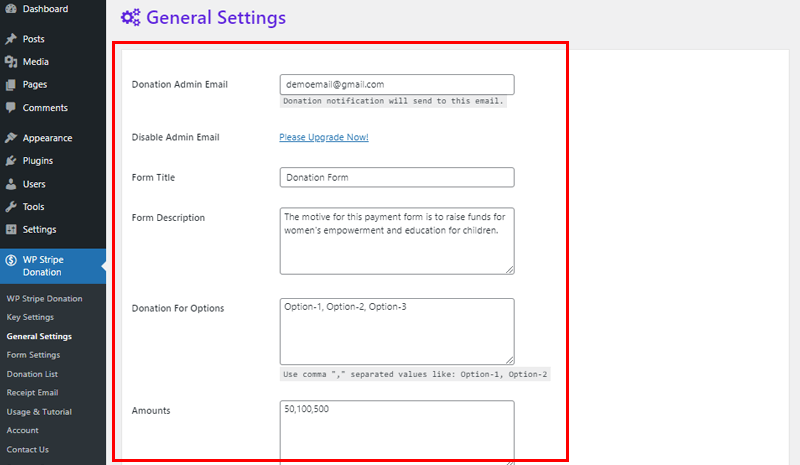
- Donation Admin Email: You can simply place the email to which you want to be notified of any donation made. For example; Here, we’ve placed it [email protected].
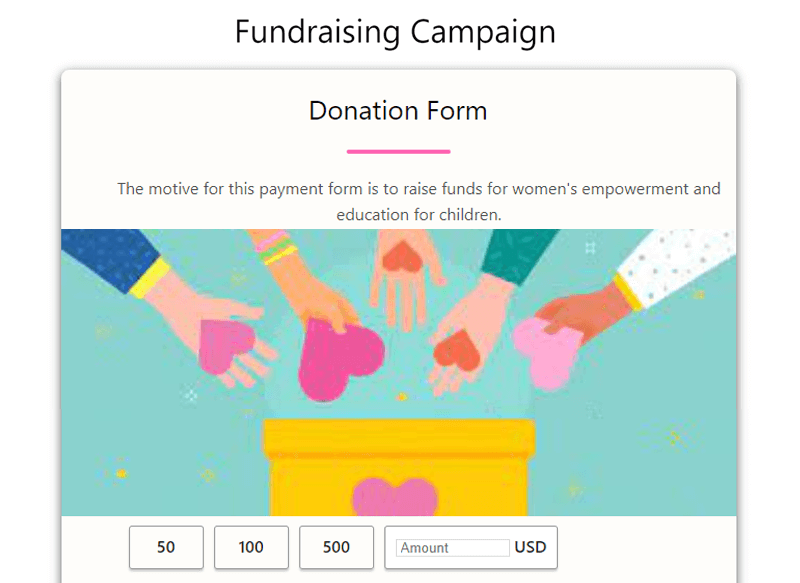
- Form Title: Give a suitable title to your form. For example; We put ‘Donation Form’. In case, if you’re creating a payment form, then you can name it likewise.
- Form Description: In this field, you can add the purpose for which you are collecting the fund or payment.
- Donation For Options: Here, you can place the options that you want to provide for your donors. For example; Option-1, Option-2, Option-3, and so forth. However, note that you have to separate the option with commas (,).
- Amounts: Using this field, you can set the amount of the options you’ve created previously. For example; 50,100, 500, and so on. Also, don’t forget to separate the amounts with commas (,).
On scrolling a bit down, we’ll find some more settings. Such as:
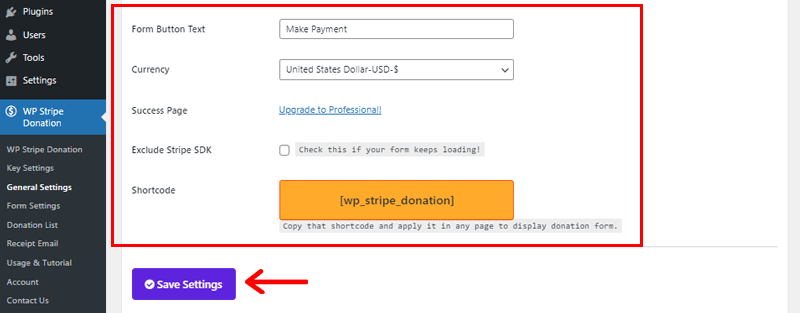
- Form Button Text: Here, by default, you can see it as the ‘Make Payment’ option. You can simply keep it as it is.
- Currency: From this field, you can choose in which currency you want to receive donations or payments.
- Success Page: You get to explore this option once you upgrade to the Professional plan of the AidWP plugin.
- Shortcode: In this field, you’ll see a shortcode that you can place on the page where you want to put your donation form. We’ll come back to this shortly.
So, once you configure the above settings, click on the ‘Save Settings’ option.
With that, you’ll see a notification of your information being updated successfully.
Having said that, let’s move to configure form settings.
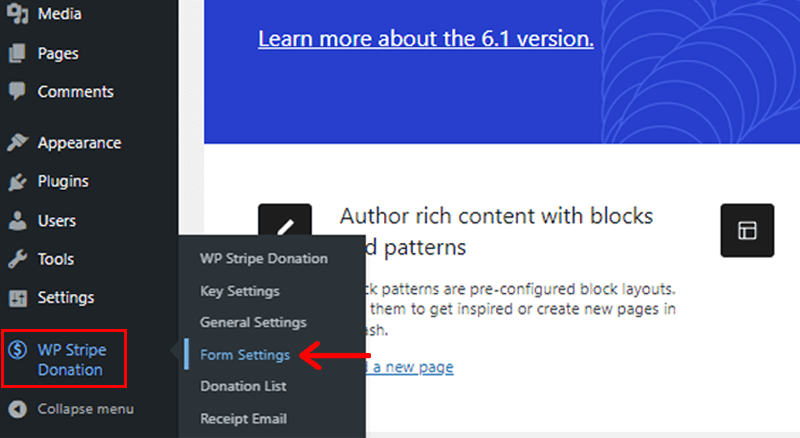
Configuring Form Settings
Same as before, from the left navigation of your dashboard go to ‘WP Stripe Donation’. And further, click on the ‘Form Settings’ option.
With that, you’ll see the page as shown in the snapshot below. There, you can see 2 tabs. Namely Content and Styles.
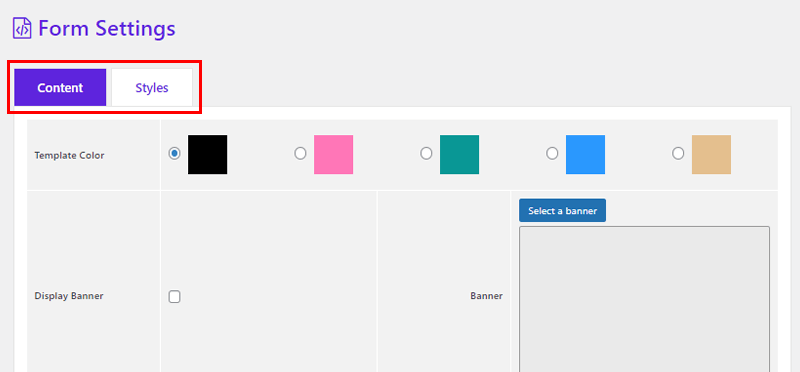
From the Content tab, you can find settings for:
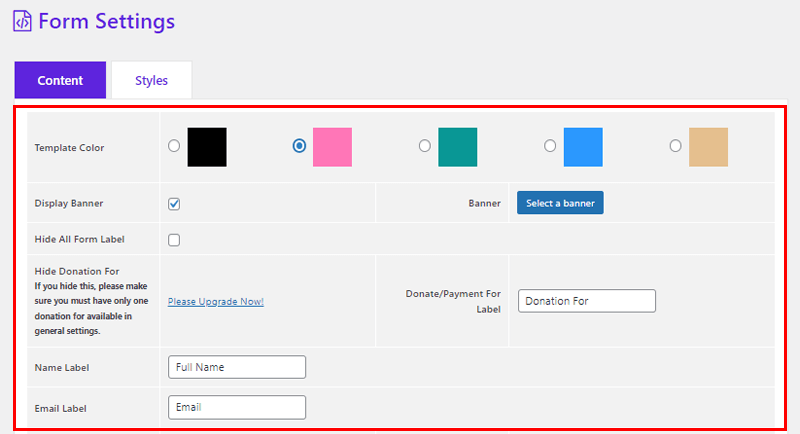
- Template Color: From here, you can pick the template color of your choice.
- Display Banner: Simply click on the box to enable the banner. Also, you can put the banner image of your choice by clicking on the ‘Select a banner’ option.
- Hide All Form Label: If you want to hide the label, you can simply click on the box. Or else, simply leave it as it is.
- Donate/Payment For Label: Here, you can see its ‘Donation For’ by default. Just in case you’re making a payment form, then you can change it likewise.
- Name Label: It’s the field where your donors will fill out their names. So, you don’t have to do anything here.
- Email Label: Same as the Name label, in this field your donors will give you their email address. You can leave it as it is.
Besides, you can find other various form settings such as Display Address field, Country Label, Show Captcha, and so on. However, these settings are available only in its premium version.
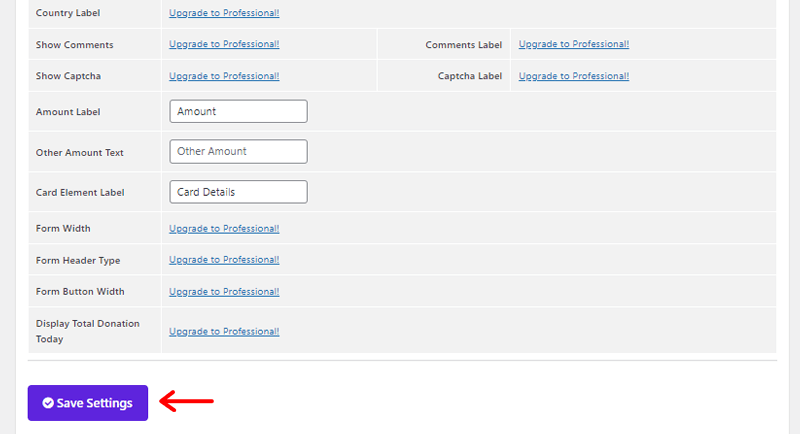
Once you make the form setting configurations, simply click on the ‘Save Settings’ option.
With that, you’ll see a notification of your information being updated successfully as shown in the image below.
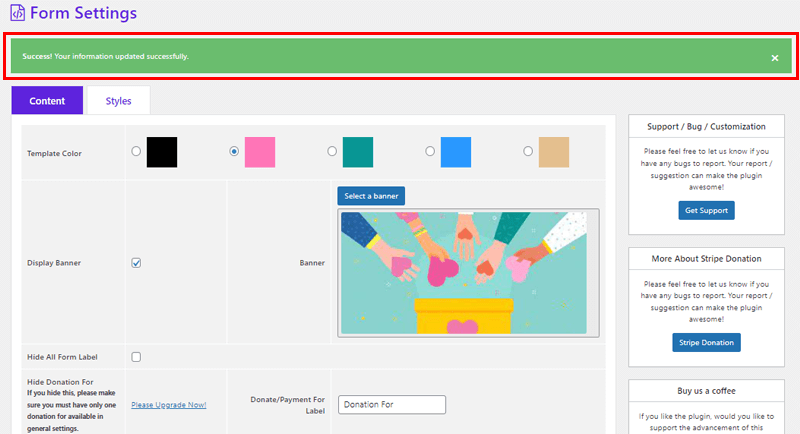
Also, you can find various other settings on the ‘Style’ tab. However, you’ve to upgrade to the premium version to access those settings. Having said that, let’s move forward to the next step.
Step 2: Connect to Stripe Payment Gateway
Next up, you need to connect to an appropriate payment gateway once you’ve created a donation form successfully. And as mentioned before, the AidWP plugin integrates well with Stripe as the payment gateway.
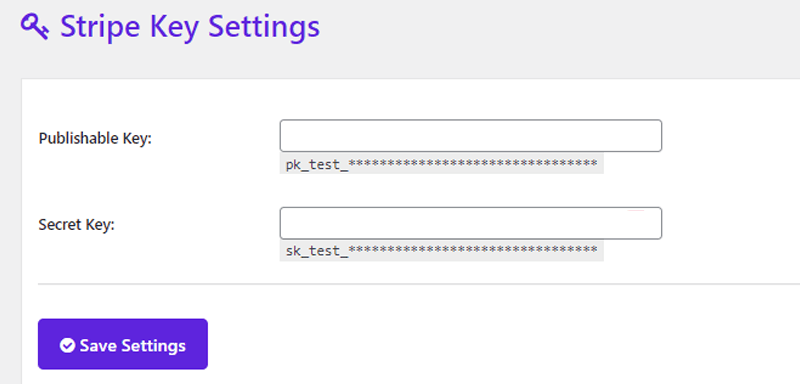
Now, so as to connect to Stripe Payment Gateway, navigate to ‘WP Stripe Donation’ and click on the ‘Key Settings’ option.
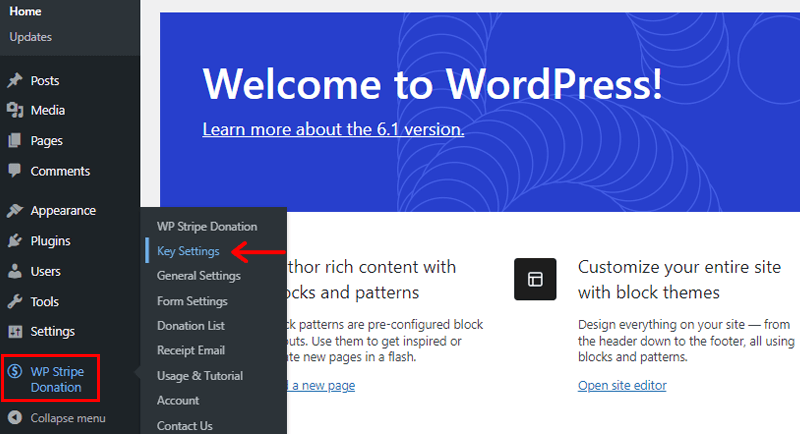
Following that, you’ll see the page as shown below.
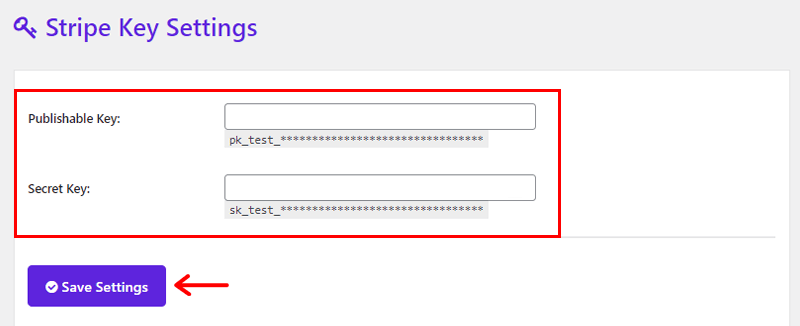
Here, you need to put the ‘Publishable Key’ and ‘Secret Key’ that you may have received via your Stripe account. Once done, click on the Save Settings option.

Shortly, you’ll receive a notification notifying you that the information has been updated successfully.
Step 3: Embed Donation Form to Page
Last but not least, now you need to add or embed your donation form to a certain page form where your donors can make the payment.
So, for that, all you need to do is come back to the WP Stripe Donation > General Settings. Scroll to the end of the page where you’ll see the ‘Shortcode’ option as shown in the image below.
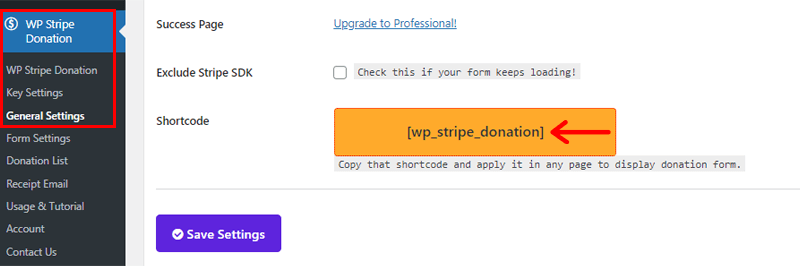
Now, simply ‘copy the shortcode’ and ‘hold on to it’.
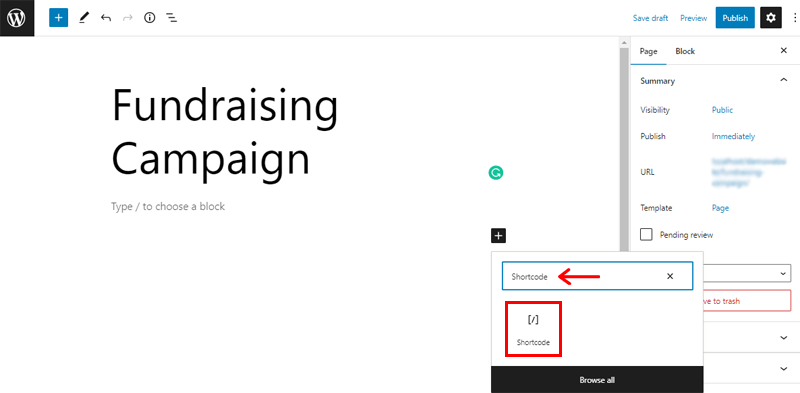
Next up, navigate to ‘Pages’ and click on the ‘Add New’ option. With that, you are taken forward to Page Editor.

Then, give a suitable name to the page you’ve just created. For instance, we’ve given the name ‘Fundraising Campaign’.
Following that, click on the plus (+) icon. And on the search bar type ‘Shortcode’. Once you locate the ‘Shortcode option’, simply click on it.
Now, ‘paste the shortcode’ that you copied previously ‘in the Shortcode box’. Then, click on the ‘Save Draft’ option in the top right corner.
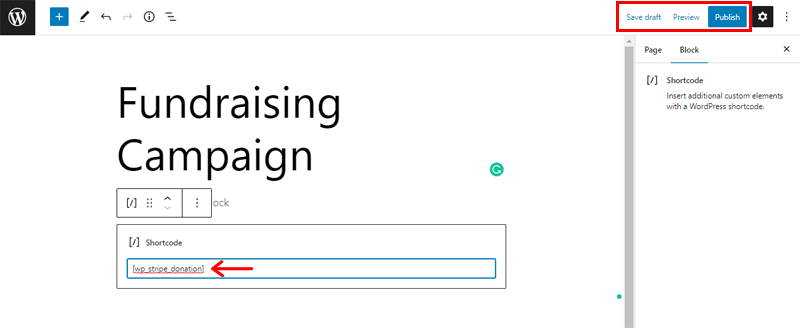
Once done, click on the ‘Publish’ button.
Finally, you can go to your live website to see a live preview of the Donation Form on the Fundraising Campaign page.
E. Cost of the AidWP Plugin
AidWP is a freemium donation plugin that offers both free and premium versions. With the free version, you get amazingly decent features to create a donation form and embed it on your website.
Moreover, you can directly get the free version of the AidWP plugin from the WordPress.org repository. Or, install it directly on your dashboard.
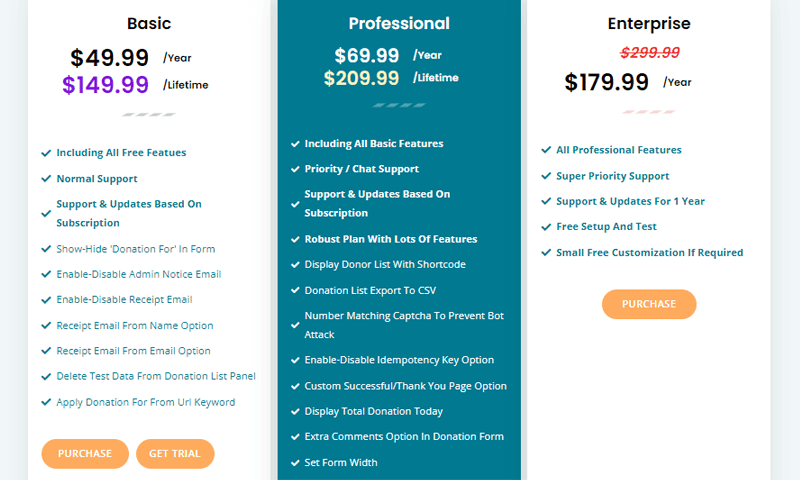
Meanwhile, you can purchase its premium version at reasonable prices to unlock its full potential. Its pricing schemes are as follows:
- Basic: Costs $49.99 per year or $149.99 for a lifetime. With all the Free features, you get support and updates, receipt email, delete test data option, and more.
- Professional: Costs $69.99 per year or $209.99 for a lifetime. All Basic features, plus priority/chat support, form width option, donor list export, etc.
- Enterprise: Costs $179.99 per year. All Professional features, plus super priority support and updates, free setup and test, and more.
Not to add, you get a 7-day free trial option to test out the capabilities before you upgrade your plans.
F. How Good is Customer Support in AidWP Plugin?
Support is something that should be prioritized equally with functionality and design. Though AidWP is a simple-to-use and user-friendly donation plugin. But, it doesn’t imply that you won’t be facing any challenges while using it.
Fortunately, AidWP has a very committed support staff group and helping team. If you ever find yourself in trouble, they are prepared to help.
Precisely, AidWP’s home page includes a Contact section on its navigation menu. You can ask for help here with pre-sale queries, feature requests, and technical support.
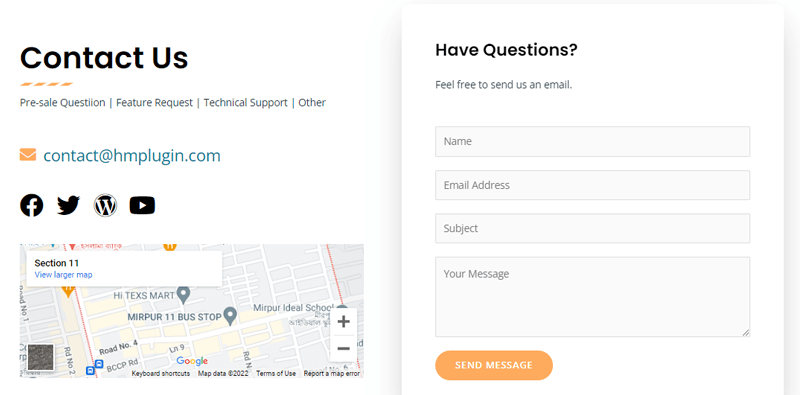
Simply complete the form, explain your issue, and press the ‘Send Message’ button. And the support staff will get in touch with you right away.
Other than that, it also offers documentation and video demonstrations that provide detailed instructions and capabilities. These resources can help you quickly get started and effectively utilize AidWP’s features.
In a nutshell, AidWP provides a few usually good and reliable support options.
With that, let’s proceed ahead to the next section of the AidWP review.
G. Pros and Cons of the AidWP Plugin
Perfection is an illusion! That implies the AidWP plugin has its own strengths and drawbacks. So, let’s explore them in this section of the AidWP review.
Pros of AidWP Plugin
- Easy to use and beginner-friendly donation plugin designed precisely for non-techies.
- Incorporated with Stripe, one of the most reliable payment processors.
- An all-encompassing donation plugin that combines all of your needs in one location.
- Comes with a shortcode option that makes it simple to include donation forms on pages.
- Offers a variety of parameters that allow you to completely tailor the donation form to your preferences.
- Performance-built WordPress donation plugin with good customer support.
- You can get started for free. Try and explore the free core plugin and eventually upgrade to the premium version.
Cons of AidWP Plugin
- Lacks comprehensive and adequate documentation.
- Most of the finest features and capabilities are reserved in its pro version.
Conclusion
And that’s a wrap, folks! We’ve come to the end of our article on the AidWP review Stripe donation plugin for WordPress.
Hopefully, we believe that you were able to understand all that we discussed in this AidWP review. With the help of the AidWP plugin, you can precisely craft the kind of donation form you want in no time.
Even so, if there’s anything we missed or that’s unclear in this AidWP review, then do let us know in the comments section. Also, please don’t hesitate to come forward if you’ve got any queries or doubts regarding this plugin. We’re happy to help you out.
Next up, do check out our other related review articles. Such as Product X Review. Hands down! It’s one of the ultimate WordPress plugins for quickly creating a wonderful online store.
Also, check out our recent tutorial guide article on how to add Google Recaptcha in WordPress login forms.
Last but not least, do continue to spread the word about our AidWP review article if you find it fruitful. Also, follow us on our social media handles Facebook and Twitter to keep up with us!