Do you want to add beautiful engaging scroll animation to your WordPress website? Then, you might want to check Scrollsequence – the powerful plugin for scrolling animation. In this article, we present you with a detailed review of Scrollsequence.
You might have seen awesome animations on Sony and Apple websites that play and rewind while you scroll. Creating such effects in WordPress had never been easier until the Scrollsequence plugin came into play. Scrollsequence lets you create attractive animated effects without having to write codes.
In this review, we’re going to give you a brief background of Scrollsequence. In addition, we’ll walk you through installing the plugin and creating a beautiful animated effect on your WordPress site.
So, let’s begin.
A. What is Scrollsequence? – The Overview
Scrollsequence is a freemium WordPress plugin for creating amazing image sequence animations for catching visitors’ attention and engagement. It lets you add professional visual effects to any page or post letting you create dynamic home pages and landing pages.
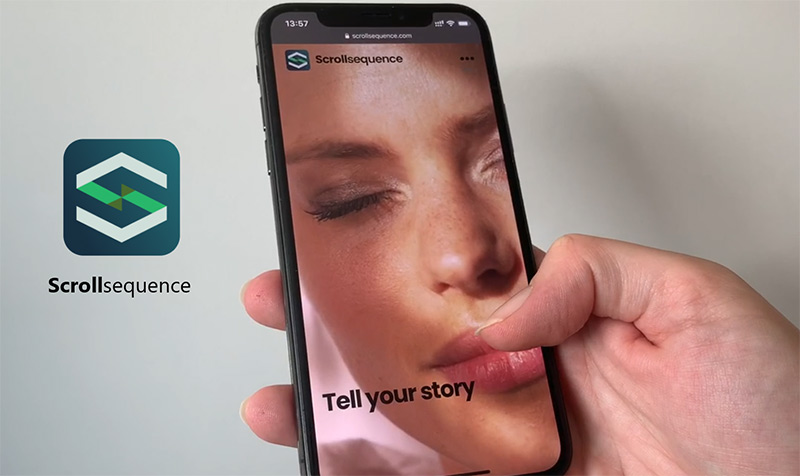
The animation effect is created by a series of images placed in individual scroll positions. And, it’s triggered simply when visitors scroll or swipe on their devices.
We found creating animation with Scrollsequence very easy – no need to hire expert developers or write a single line of code. Just add the images, and headings, select the animation effect, and it’s all ready to add. Also, adding the animation to your pages is easy with shortcodes. It has more than 1,000 active users and a 5 out of 5-star rating.
It’s useful not only for making your website engaging, but also to make users understand your brand creatively. Businesses can make use of Scrollsequence to showcase their products as well.
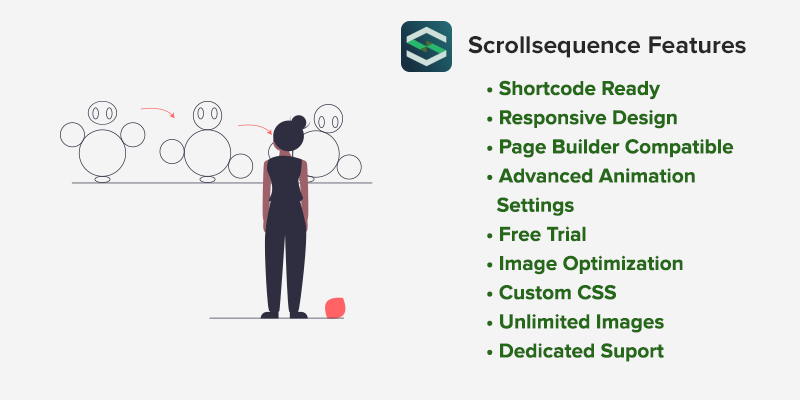
B. Scrollsequence Review – The Features
Now, let’s see the features of Scrollsequence.
1. Shortcode Ready
The best thing about Scrollsequence is that it’s shortcode-ready. After you create a design with Scrollsequence, it will give you a unique code (shortcode).
The shortcode can be added anywhere on the web page using the Shortcode widget. This also works if you are used to creating and designing pages with different page builder plugins.
2. Responsive Design
Scrollsequence has a responsive design that supports devices without breaking or stretching. The animation you create looks good on all devices whether users are browsing through phones, tablets, or desktop devices.
Specially created with a mobile-first design, the animated page created with Scrollsequence runs seamlessly on all-sized mobile devices. With that, you don’t miss the visitors on any device.
3. Page Builder Compatible
Scrollsequence is fully compatible with page builders. If you’re like most WordPress users who use page builders for creating, you can use Scrollsequence without any problem.
It seamlessly integrates with major page builders like Elementor, Divi, Oxygen Builder, and Beaver Builder. You can use those page builders to create shortcode-fueled Scrollsequence animation and place it anywhere on your website.
4. Animation Settings
In Scrollsequence, you get several useful animation settings that are barely available in other scroll animation tools. Some are –
- Scroll delay – It lets you add the scroll delay parameter to make the animation effect start a little slower. It gets a more smooth browsing experience for users.
- Content animation – You can animate any HTML content inside Scrollsequence.
- Content animation options – You’ll have a handful of animation effects for headings and paragraphs associated with the scroll animation.
- Image duration – lets you set image duration (in pixels) on how long it displays before changing to another.
5. Free Trial
Another great thing about Scrollsequence is that it provides a 14-day free trial of the pro version. Just enter your email address and name, and start the free trial easily. No need to enter any card information!
With that, you’ll have access to all the premium features with access to support as well. So, if you get into any problem with the plugin, it will be resolved with the help of the support team.
C. Getting Started with Scrollsequence – A brief Walk-Through
Now that you have a good perspective about Scrollsequence and its features, let’s go ahead and create an animation. We’ll utilize its various features to animate the web page, add headings and texts, add that to a web page, and see a live demonstration.
Let’s begin.
i. Installing Scrollsequence
Scrollsequence offers both free and premium versions.
You can make it work with the free version. However, the premium version adds more cool features. And, don’t forget the 14-day free trial. So, you can try and test with the free trial and get the premium if you like it.
For now, let’s see how you can install Scrollsequence and activate the license for a free trial.
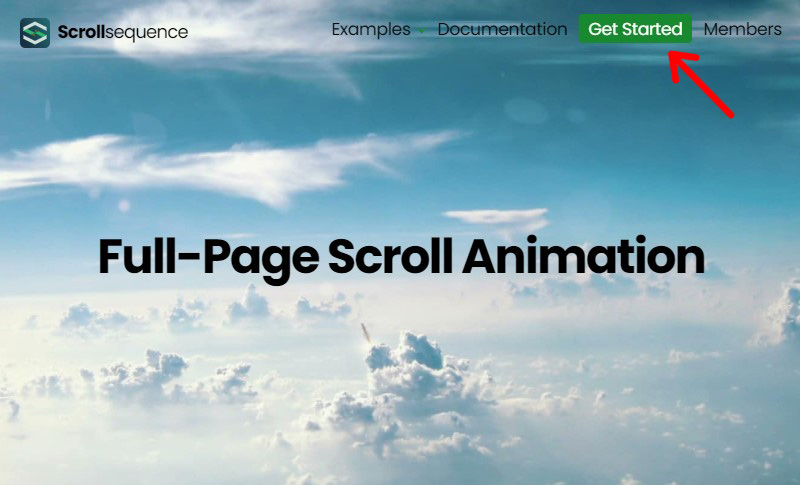
First, go to the Scrollsequence official website and click on the Get Started button you see at the top.
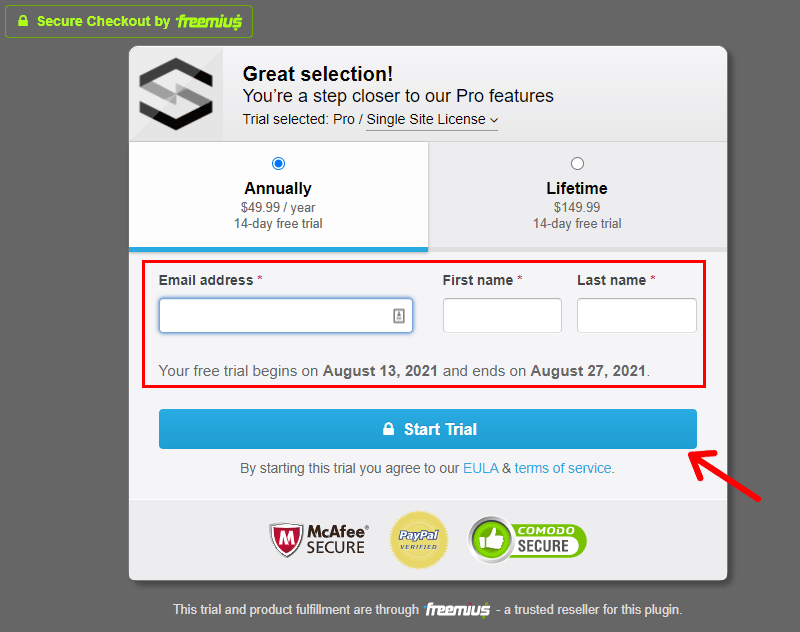
On the next page, scroll down below to the Pricing section, and click on Start Trial.

On the next page, fill in your information – email address, name, and phone number (optional). Then, click on Start Trial.
After that, check your email. You’ll have received an email from Scrollsequence with the link to download the plugin and the license key to activate it.
You’ll need the key later, so hold on to that. And download the Pro plugin, from the link.
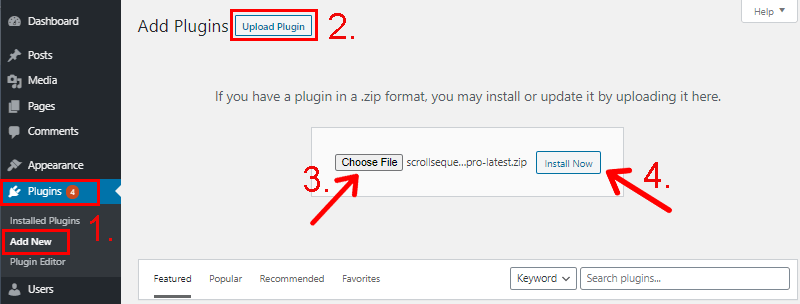
Now, log in to WordPress on a new tab, then go to Plugins > Add New > Upload Plugin. Then, browse and upload the plugin from the downloaded location on your PC. Finally, click on Install Now.
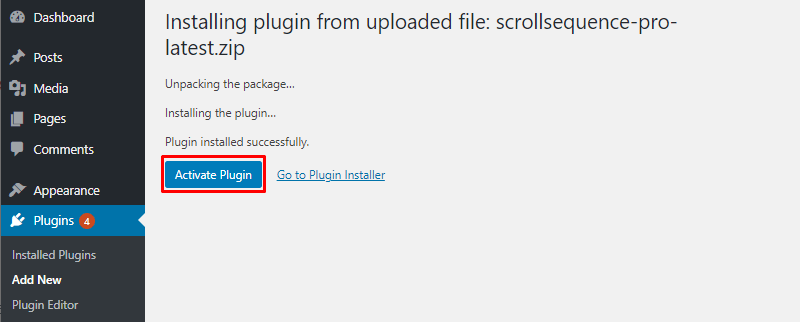
The installation takes a few seconds. After it’s done, click on Activate to activate the plugin.
If you want help, then here’s a guide to installing a WordPress plugin.
ii. Activating License
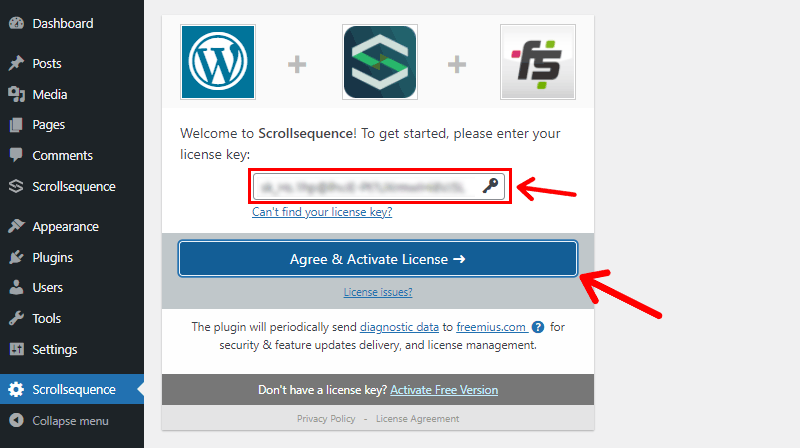
After activating, it’ll redirect you to the Scrollsequence activation page.
Now, copy the license key from the email and paste it into the text field. After that, click on Agree & Activate License.
All set!
iii. Creating a New Animation with Scrollsequence
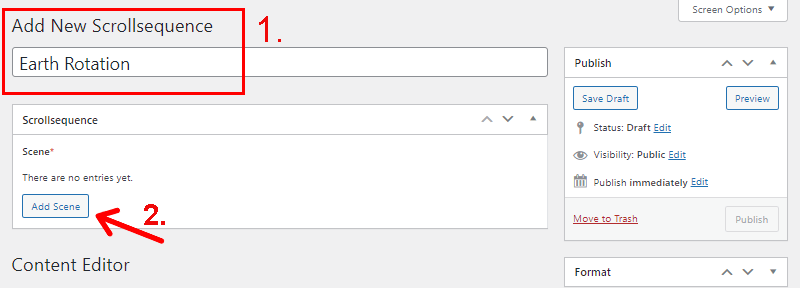
Now, the fun part – let’s create a proper animation. So, go to the Scrollsequence menu and click on Add New Scrollsequence.

Now, you’ll reach the interface for creating the animation. It looks like this.
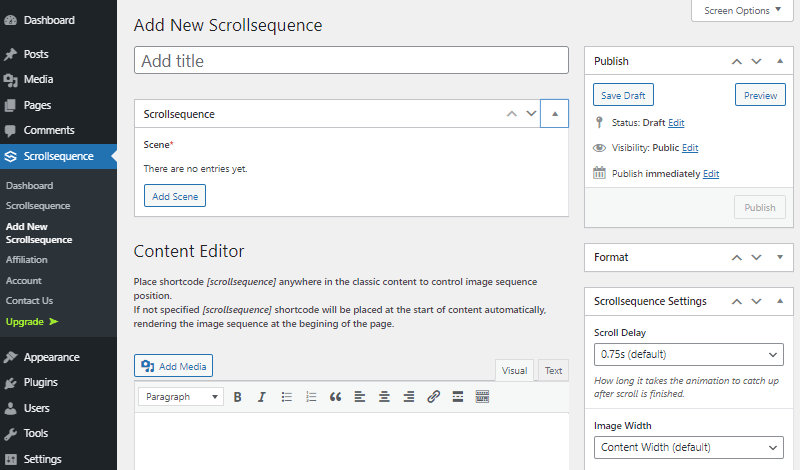
Start with adding a title. Then, click on Add Scene to add your images for creating the moving effect.
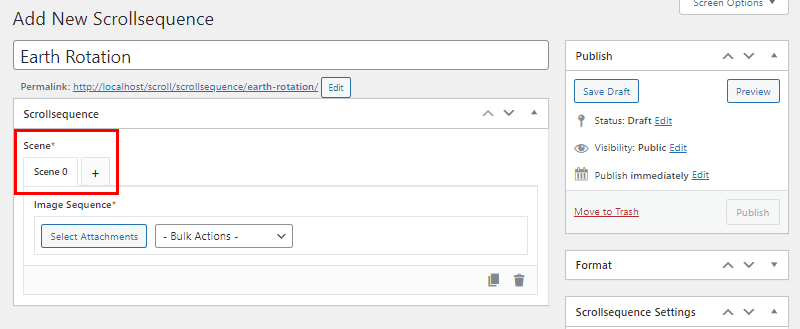
#Add Scenes
On clicking Add Scenes, it’ll create a new Scene ‘Scene 0’ where you can add your sequence images.
One good feature of Scrollsequence is that it lets you create multiple scenes. This is useful if you want to have longer animations with different images and effects. To add more scenes, just click on the Plus button (+) next to the Scene.
All the different scenes can have varying images, settings, and effects. We will see it next.
#Collect Sequence of Images
Just a reminder – Scrollsequence creates the moving animation effect out of the series of ‘pictures’. So, what you need to do is create and upload images in order. Typically, the plugin authors recommend having at least 50 to 100 images to see the effect better.
Chances are you have no idea how you create the series of images. To be honest, we ourselves spent some time figuring it out.
First thing, you’d want to have a short video clip. Then, use an online tool to pick multiple frames from it. However, the tools caused issues like limited size, corrupted file output, low frame rate conversion, etc. Alternatively, you can take help from freelancers to do the task, or use image packs (1,2) provided by Scrollsequence.
#Upload the Images
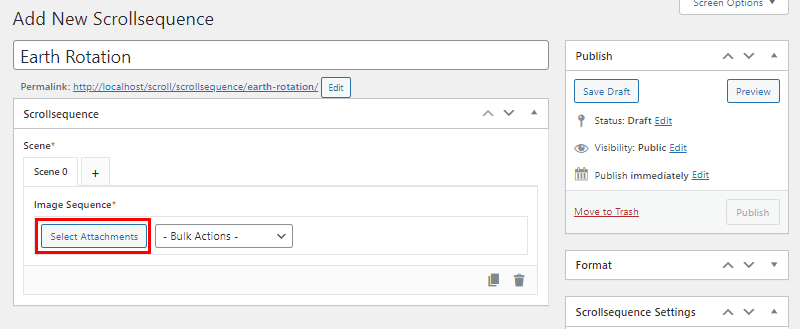
After you have collected the images, add them to the Scene. We suggest you first upload them to the image library.
After that, click on Select Attachments on the Scene tab to add images.
Then, select the images you want to add and upload them. So, here they are.
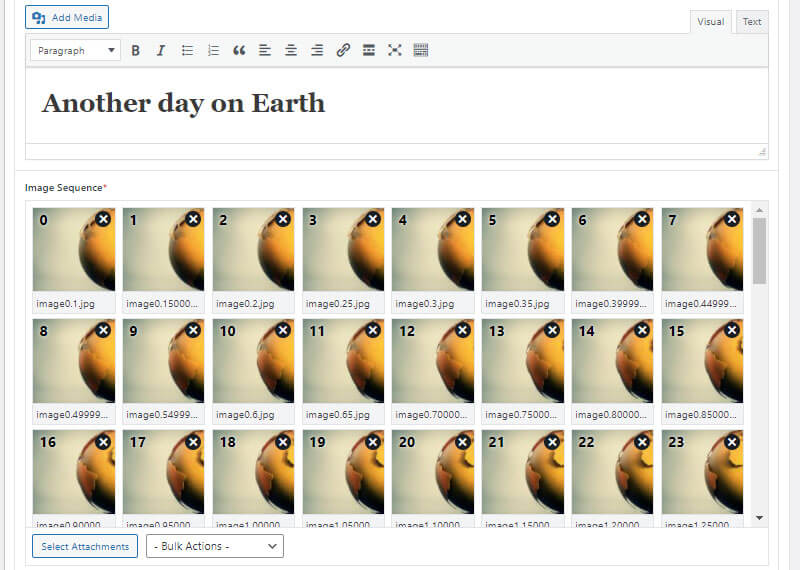
The images will be automatically assigned numbers, starting from 0. We had added 100 images, so they got the numbering 0 to 99. You’ll need it later for animating the content.
By any chance, if your images are added out of order, then it will distort your animation. Luckily, it didn’t happen to us. Even if it did, you can reorder them with the drag-and-drop method. Also, there are options to sort in bulk, reverse the order completely, or delete all images.
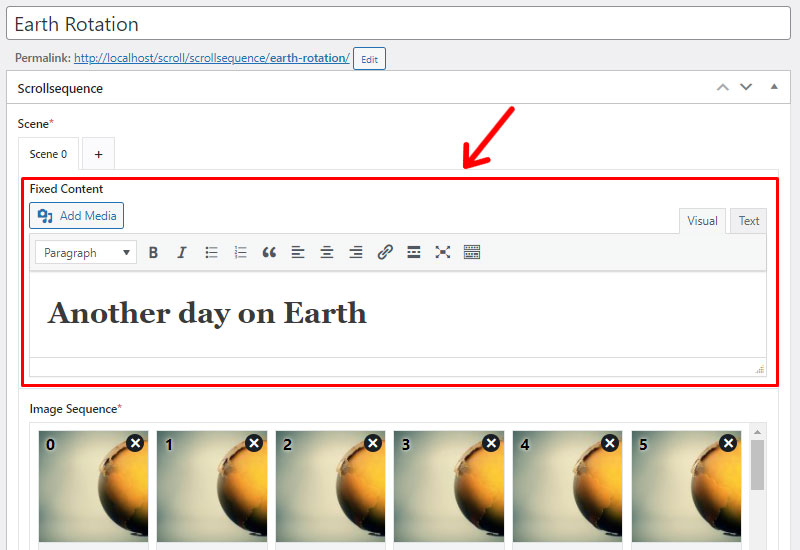
#Add Content over the Images
Once you select and add the images, you’ll get a new editor area on top of it labeled as ‘Fixed Content’. It’s for adding headings and other content over the image sequence.
It has a default heading already there. You might want to change it according to what you want to display.
Within the images, we added and the default heading tag, we’ll have our animation something like this.
You can convert back and forth between the Visual and Text editors creating headings. If you go to the ‘Text’ editor you’ll see that the heading is assigned to an ID (a unique identifier) and enclosed inside a div (division).
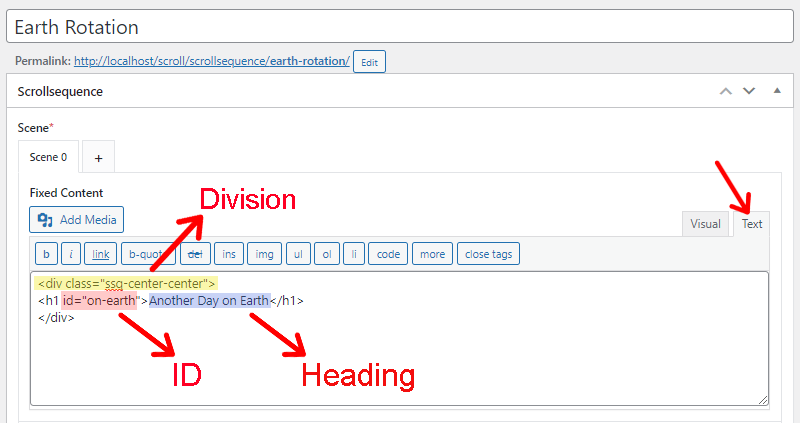
You can change the heading title as you need. Changing ID is also a good idea to do if you’re doing animation for multiple elements. You can also tweak the div (division) if you know what you’re doing.
In our testing, we changed our heading title and assigned it a new ID.
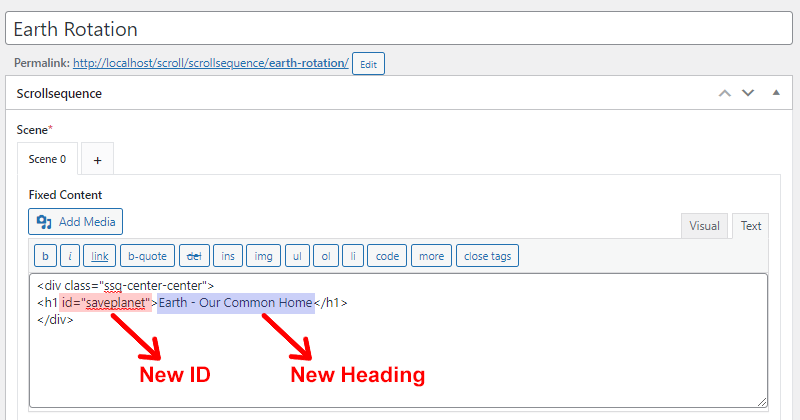
You can also add other headings, plain texts, links, shortcodes, etc. if you want.
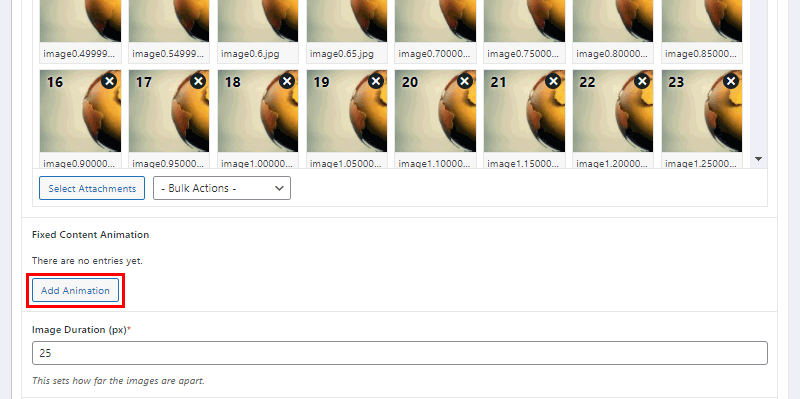
#Add Animation
Next, let’s add animation to our heading. For that, scroll down below and click on Add Animation.
Doing so, a new menu for animation adds up in the interface. There, you can see –
- Selector – Here you enter the ID of elements you want to animate preceded by a hash (#). Example: #saveplanet
- Start – Enter the number of the image from where you want the animation to start.
- End – Enter the number of the image for the animation to end.
We wanted the heading animation to appear between image 10 and image 80.
So, under Fixed Content Animation, we entered –
- Selector – #saveplanet (ID of the heading)
- Start – 10 (starting point)
- End – 80 (ending point)

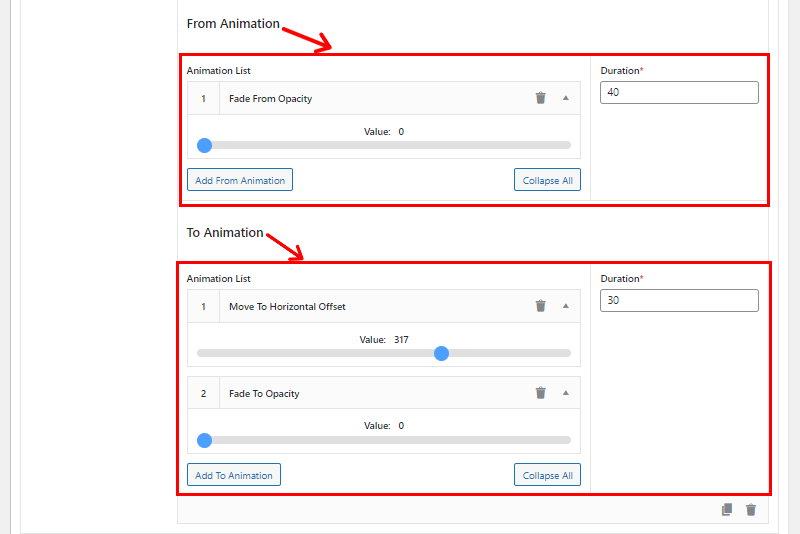
Next, choose the animation effects for start and end i.e. From Animation and To Animation respectively. There are 4 options available to choose from. After choosing, you can also adjust the value for each animation.
Also, enter the Duration next to each animation.
We spent some time trying and testing the effects and durations. Also, we found out that using multiple effects is possible, which is pretty cool.
Finally, our setting was like this.
We have shown how the page looks below.
# Configure Other Settings
To get some more level of precision, you can tweak other settings available there.
First, enter the Image Duration. You’ll find this setting by scrolling down further below. It sets the distance between each image in the sequence. I.e. the higher value you enter, the longer each image displays. You can leave it at the default value i.e. 25 pixels.
Just below it, you’ll find the Image Scaling and Alignment settings. Here, you find levels for adjusting image alignment and screen fit for mobile and desktop devices.
The next cool thing to do is Scroll Delay the animation. It lets you choose the duration it takes to catch on to the animation after scrolling.
Moreover, there are other settings like image opacity, content width, custom CSS, and so on. They are all for you to try and use as you prefer.
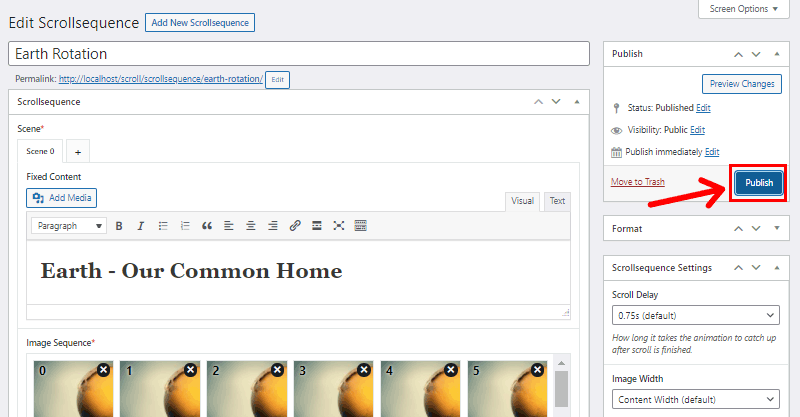
#Publish Scrollsequence
After you’re done with animation, publish it.
iv. Adding Animation to a Page using Page Builders
Now, let’s see how to add the created animation to a web page.
You can do it easily with shortcodes. That is to say – it runs well in any page builder that has support for shortcode.
This makes it easier to add the animation with page builders like Gutenberg, Elementor, Divi, Beaver Builder, etc.
For now, Let’s see adding the animation shortcode on Gutenberg and Elementor for demonstration.
# Adding Scrollsequence on Gutenberg
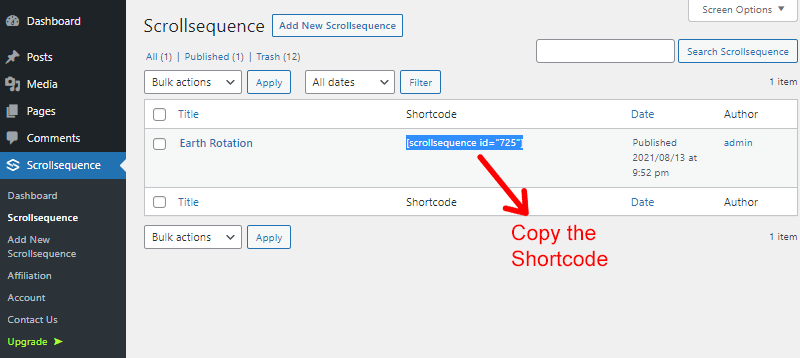
So, go to Scrollseqence > Scrollsequence from the dashboard. There, you’ll see the list of animations you have created. Under the ‘Shortcode’ column, you’ll find the shortcode of your animation.
Simply, select the shortcode and copy it.
Now, create a new page and display it there. Else, you can also add it to a post, a new one, or an existing one.
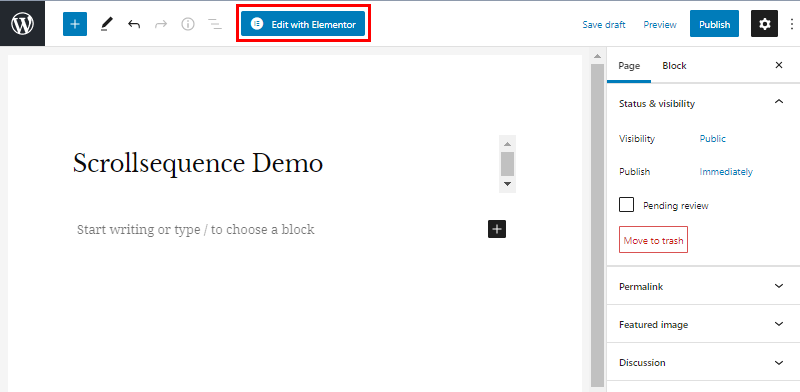
To create a new page, go to Pages > Add New.
Now, you’ll see your WordPress Gutenberg editor. Then, click on the plus sign (+) to add a new widget. Search for ‘shortcode’. At last, paste the shortcode you copied earlier.
After that’s done, publish your page.
#Adding Scrollsequence Animation with Elementor
First, make sure you have installed Elementor, either a free or a premium one.
Now, go to the page you want to add the animation, and then open the page with Elementor.
After that, you’ll reach the Elementor page editing interface. On the right sidebar, search for the widget ‘Shortcode’. You’ll see the shortcode widget below it.
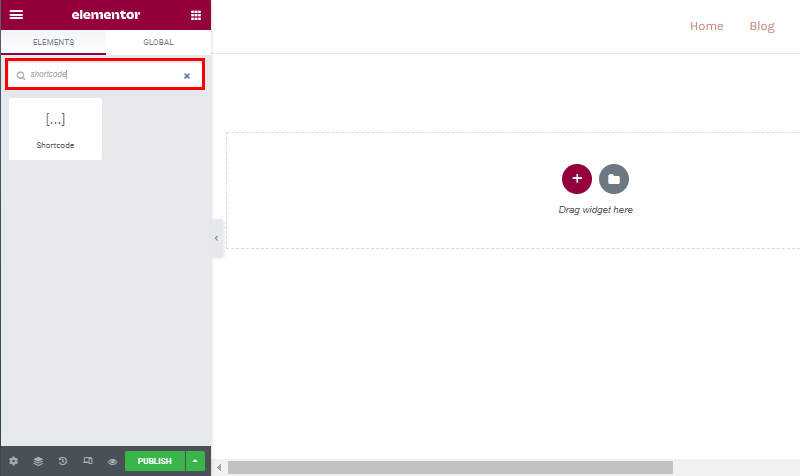
Now, drag and drop the widget in the page area. After that, page the Scrollsequence shortcode and click Publish at the end of the page.
Similarly, you can add the Scrollsequence animation with similar steps on Divi, Oxygen Builder, and Beaver Builders. Just add the shortcode widget, enter the shortcode, and publish the page. It’s simple and super easy.
Now, go to your page and see how your animation looks. Here’s what our’s looked like.
D. Scrollsequence Pros and Cons
Now, let’s look at the pros and cons of using Scrollsequence.
Pros
- Robust tool for animating web pages
- You can animate other elements on the page
- Lots of options for animation for creating with own intuition
- The animations are responsive and SEO-friendly
- Fast and supportive response from the customer care
Cons
- The plugin is in development, however, it looks promising. We expect it to come with more added and improved features soon.
- Beginners might have to spend some time to completely figure it out.
E. Scrollsequence Pricing
As we already discussed, Scrollsequence provides a free plan for getting started. It has basic functions like adding up to 3 scenes, 100 images per scene, and basic animation.
On the other hand, it offers 2 premium plans –
Pro (49.99 per yearly | $ 149.99-lifetime payment)
It offers advanced features like advanced animation, responsive image scaling, unlimited scenes and images, animation of any element, email support, and more.
Business ($149.99 per yearly | $ 499.99-lifetime payment)
It includes all the advanced features offered in the Pro version. Moreover, you’ll have a personal success manager and setup & customization package.
It also offers a free trial of the pro version. So, you can go ahead and check it on your website yourself before purchasing the premium versions.
F. Conclusion
There you have it. We have reached the end of our comprehensive guide on Scrollsequence review.
With Scrollsequence on your WordPress website, you can attract potential clients and win customers. It’s obvious that your website looks more professional with eye-catching landing pages. So, you get way ahead of the competitors in your niche.
You can check out our detailed review of PostX, the robust WordPress Gutenberg blog Grid plugin for additional reading.
We’ll be doing detailed reviews of newer WordPress plugins and tools regularly. So, follow us on Facebook and Twitter for updates.